rules
When you were a kid you hated them. And I’ll bet there are times as an adult that you wish they didn’t exist too!
The wonderful thing about rules in photography is that you can break them. As many times as you like. However you like. Because they’re not really rules…. more like guidelines.
Over the next few weeks I’ll be sharing with you my 5 favourite, and incredibly easy to remember, rules guidelines to help you improve your photography.
the rule of thirds
The most basic of all photography rules.
When you’re just starting out, it’s going to be tempting to put whatever you are photographing right in the centre of the frame. Boring!
The rule of thirds states that for an image to be visually interesting, you need to divide your frame into thirds – both horizontally and vertically – with the main focus of your image on one of these imaginary lines or at one of the points where they intersect.
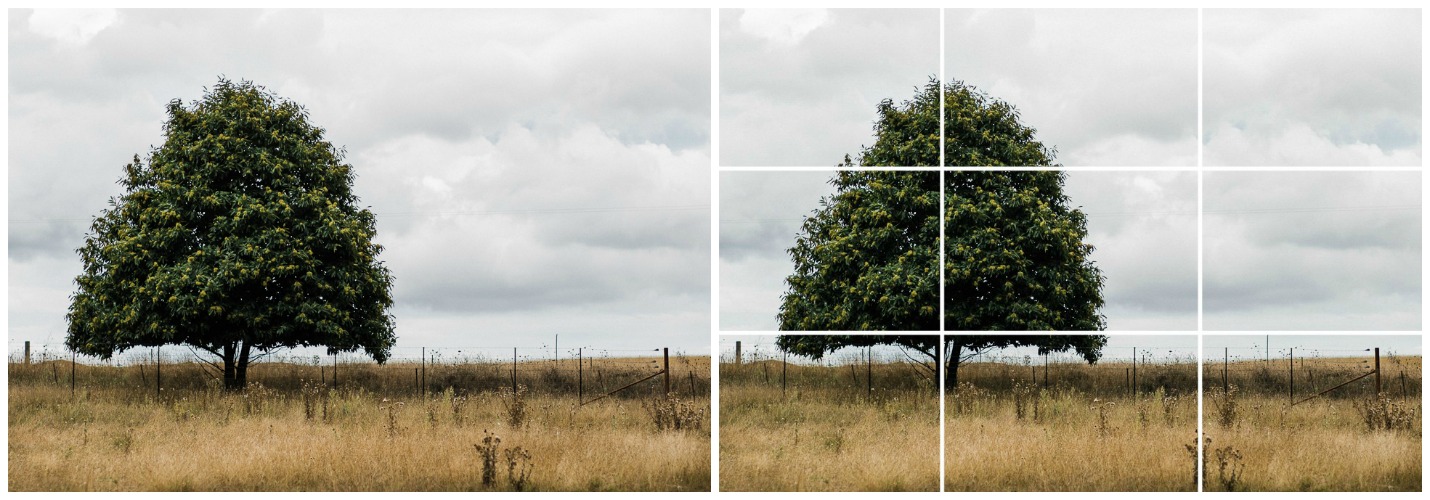
rule of thirds – a landscape example – see how the tree in on the left-hand vertical line?
why does it work?
The human eye tends to be more interested in images that are divided into thirds, especially when the subject falls at or along one of those divisions.
Check your camera – whether it’s your phone camera, a point-and-shoot or a DSLR – as many cameras will actually give you a visual grid in your viewfinder to help you practice this rule. If your camera doesn’t have it (or you can’t find it!) use your eye to roughly divide your image with four lines into nine equal-sized parts (like the grid above right), then place your subject at the intersection of those lines.
With practice, the rule of thirds will become second nature, and you’ll just know when your composition looks right.
Below are a couple more examples, with grid lines, to show you how easy it can be to incorporate the rule of thirds into your photography knowledge bank.
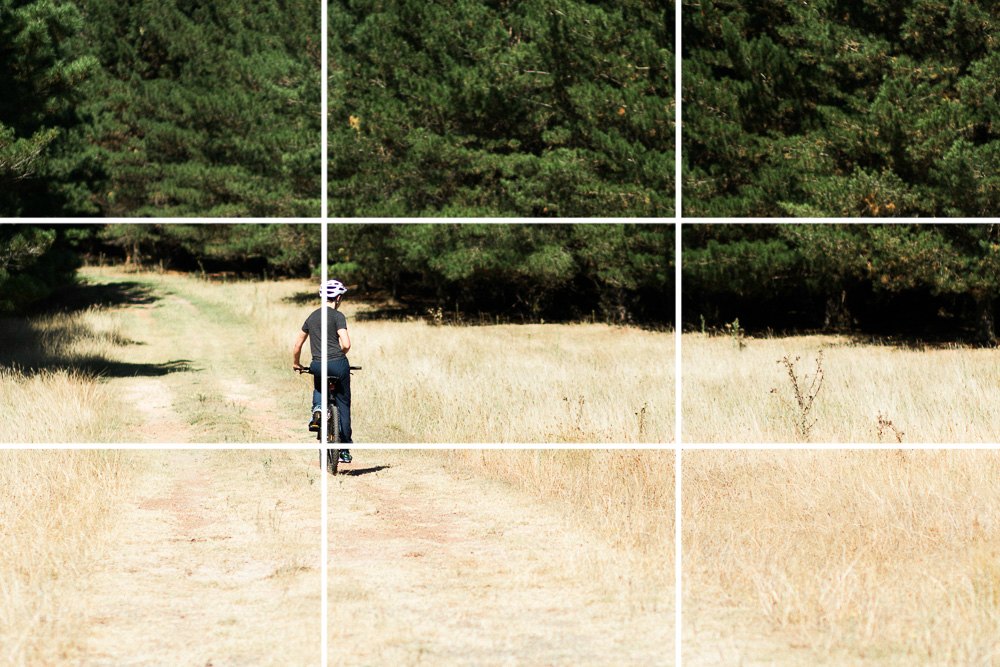
here my Boy and his bike sit on the left-hand vertical grid line
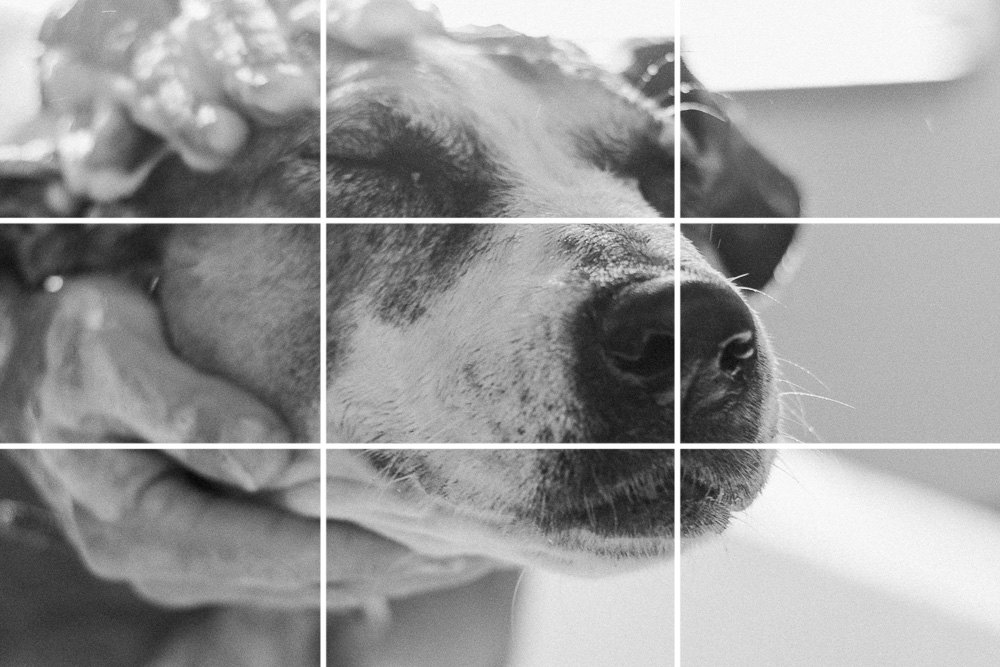
here the dog’s nose sits on the right-hand vertical line and her left eye sits near the top-left-hand intersect (notice I say ‘near’ – I’m bending the rules a little!)
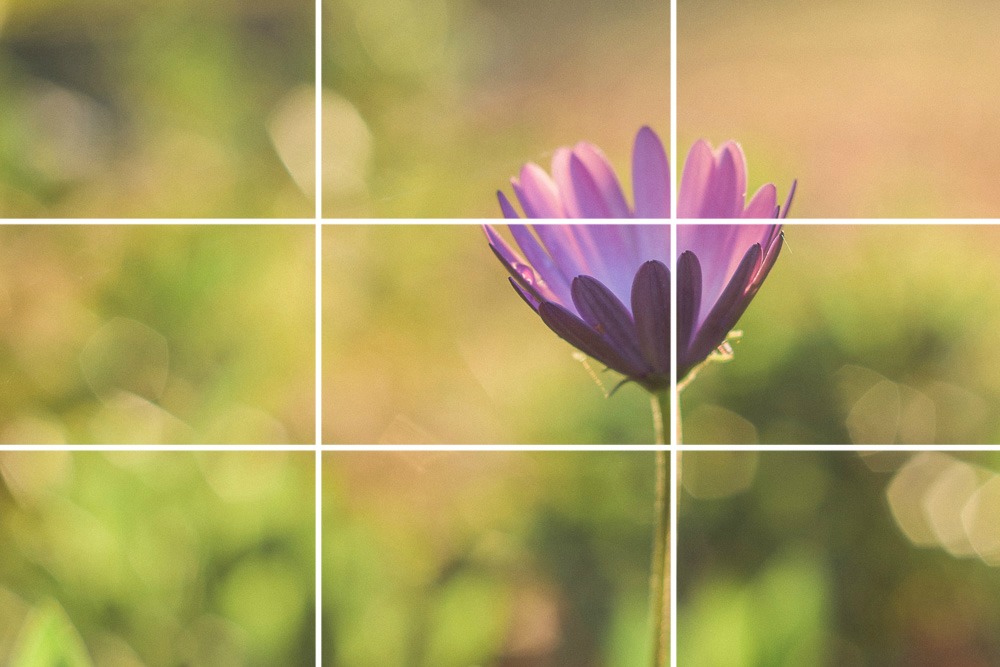
here the flower sits on the right-hand vertical line, plus the petals (and the burst of colour) are near (another rule bend!!) the top-right-hand intersect
taking it a step further
While placing your subject on any of the lines and intersects of the gridline will add emphasis to your subject, under certain situations, some are stronger than others.
For example, when your object or subject is alone in an image, the strongest position is the left-hand line (see my Boy on his bike above).
it really is as simple as that!
So my challenge to you. This week pick up your camera and incorporate the rule of thirds into your work. Turn on your grid lines if you have them and if you don’t jump into practising without them.
In the comments, I’d love:
If you want to share any examples of your practice, please do so. And let me know how you went with adding the rule of thirds to your knowledge bank!
And stay tuned for #2 framing – coming up soon!
Tasha